Table of Contents
ECMLink 101 - Installation
Laptop application and driver
Application: Installing ECMLink on your laptop is pretty simple. You just download the latest installer off our website or you install it off the CD included in your package. To download the latest installer off our website, hit our Downloads page. To install off the CD, just following the instructions included on the Quick Reference guide in your package.
Driver: Installing the device driver is just about as simple. Just grab the driver installation file off our downloads page and run it. Then when you plug our cable into your laptop, Windows should recognize it automatically.
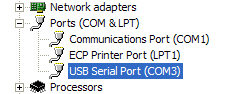
Verify: Verify that the laptop has installed the driver for the cable correctly and that it has assigned a COM port to it. You can do this by pulling up the Device Manager and looking for something like this:
ECU and/or V3 flash device
Installing the V3 flash device into your ECU is fairly easy. You can find a brief outline in our Chip Install document.
Installing the ECU into your car is just the opposite of removing it. We do not currently have pictures of this process, but it basically involves removing the two side kick panels (each side of the center console) and then removing a few 10mm bolts holding the ECU in place. The ECU is physically located “behind” the radio.
First time power up
Once the laptop application is installed and the ECU is in place, you're ready to power it all up. Turn the ignition key on and observe the check engine light. It should be on for a few seconds and then turn off by itself. This is a good indication that the ECU is working properly. If the light comes on and stays on, then something may be wrong with the ECU. If you hear a bunch of relays clicking like crazy as soon as you turn the ignition key on, then something is definitely wrong with the ECU. If you suspect the socket job may not have been done properly, then open the ECU and compare to pictures shown on our ECU Repair page.
Connecting
As long as everything seems to be powering up OK, then you should be ready to connect to the ECU. Connect one end of the cable to the diagnostic port in the car and the other end into your laptop. Refer back to the driver installation section above if this is the first time you've connected the cable to the laptop.
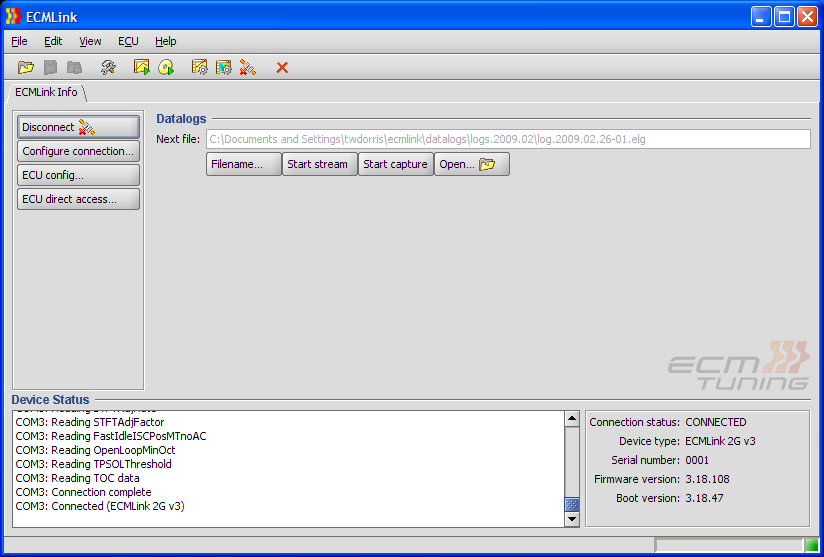
Once it's all physically connected, you should be able to hit the connect button on the ECMLink application and have it connect to the ECU. During the connection process, the application downloads a complete copy of the ECU's configuration into memory. The screen will look something like the following once it's connected.
If you are having trouble connecting, please refer to our Connection Diagnostics page. And by “refer”, I mean really read through it and actually verify the stuff it suggests. By FAR, most connection problems are related to something on the user's end. It's VERY, VERY rare for a cable to be shipped out of here with a problem and it's EXTREMELY rare for a problem with the chip itself to cause a connection issue but otherwise run the engine fine. So please consider absolutely all possible problems on your end first before considering that the problem might be with the cable and/or the ECMLink chip somehow.
Screenshots of general application usage can be found on our Screenshots page.
Page Tools
